MiniTool Partition Wizard Server 8
- Convert NTFS to FAT. New!
- Copy Dynamic disk volume. New!
- GPT Disk and MBR Disk interconversion. New!
- Copy UEFI boot disk.
- Convert GPT-style Dynamic Disk to Basic.
- Move Boot/System volume for Dynamic Disk.
- Read more...
Wipe Partition
Partition Wizard Help
Getting Started
Using MiniTool Partition Wizard
- MiniTool Partition Wizard Basic
- General
- Menu Of View
- Disk Operations
- Align All Partitions
- Copy Disk
- Delete All Partitions
- Rebuild MBR
- Initialize to MBR Disk
- Initialize to GPT Disk
- Partition Recovery
- Wipe Disk
- Disk Properties
- Convert Dynamic Disk to Basic Disk
- Convert MBR Disk to GPT Disk
- Convert GPT Disk to MBR Disk
- Surface Test
- Partition Operations
- Extend Partition
- Split Partition
- Align Partition
- Move/Resize Partition
- Merge Partition
- Copy Partition
- Explore Partition
- Create Partition
- Delete Partition
- Format Partition
- Label Partition
- Change Letter
- Set Active/Inactive
- Hide/Unhide Partition
- Check File System
- Convert FAT to NTFS
- Convert NTFS to FAT
- Wipe Partition
- Partition Properties
- Set Partition as Primary
- Set Partition as Logical
- Surface Test
- Change Partition Serial Number
- Change Partition Type ID
- Change Cluster Size
- Dynamic Disk
- Create Volume
- Delete Volume
- Format Volume
- Move/Resize Volume
- Wipe Volume
- Explore Volume
- Check File System
- Change Volume Label
- Change Volume Letter
- Change Volume Cluster Size
- Volume Properties
- Wizard
- Technical Support
Create Volume
-
You can employ MiniTool Partition Wizard to create dynamic disk volumes including Simple Volume, Spanned Volume, Striped Volume (Raid 0), Mirrored Volume (Raid 1) and Raid-5. Different volume need different precondition.
Simple Volume: A simple volume is a dynamic volume that is made up of disk space from a single dynamic disk.
Spanned Volume: A spanned volume is a dynamic volume consisting of disk space on more than one physical disk. You need at least two dynamic disks in addition to the startup disk to create a spanned volume.
Striped Volume (Raid 0): A striped volume is a dynamic volume that stores data in stripes on two or more physical disks. Striped volumes offer the best performance of all the volumes that are available in Windows, but they do not provide fault tolerance.
Mirrored Volume (Raid 1): A mirrored volume provides an identical twin of the selected volume. All data written to the mirrored volume is written to both volumes, which results in disk capacity of only 50 percent.
Raid-5: Three hard drives, which can be IDE, SCSI or mixed structure, are entailed. All disks relevant to RAID-5 volume must be dynamic disks and operating system boot files and system files must be stored on another volume.
Create volume with MiniTool Partition Wizard
Step 1: Launch MiniTool Partition Wizard, select and right click an unallocated dynamic disk, then click "Create Volume" from the popup menu.
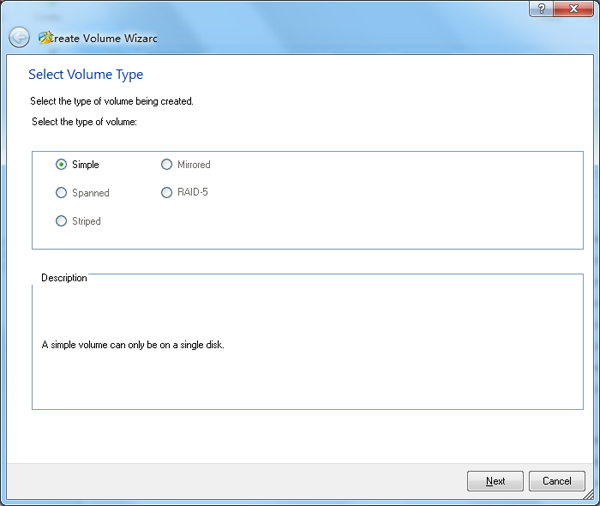
Step 2: Select the type of volume to be created in the popup window. MiniTool Partition Wizard supports creation of Simple Volume, Spanned Volume, Striped Volume, Mirrored volume and RAID-5. Select Simple and click "Next".
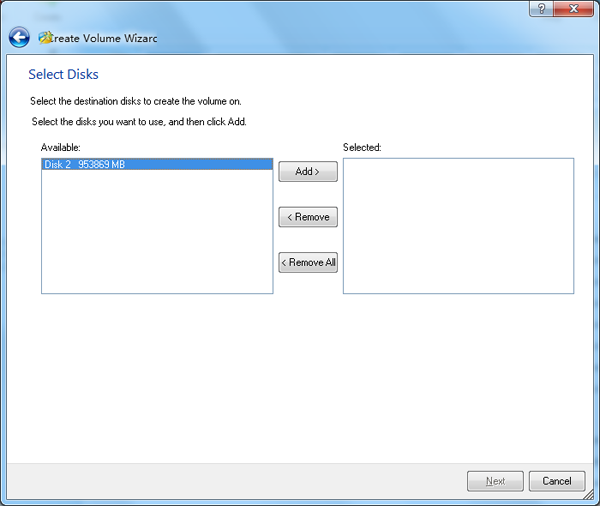
Step 3: Select the destination disk where volume is to be created by only selecting the corresponding disk and then clicking "Add" to add this disk to the right box. After than, click "Next" to enter next page:
Step 4: Set relevant parameters including Volume Label, File System, Driver Letter, Cluster Size and Volume Size/ Location for this new volume according to this page.
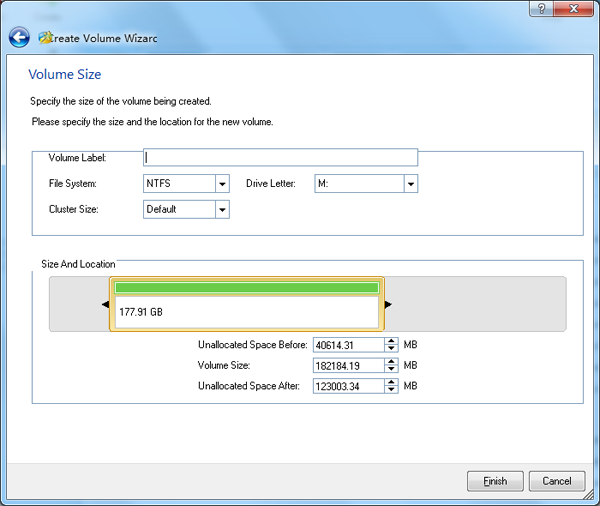
Step 5: Click "Finish" to finish creating volume.
Featured
Clients
Clients


Copyright (C) 2009-2013 www.PartitionMagicServer.com, All Rights Reserved. Partition Magic ® is a registered trademark of Symantec Corporation.